Use this guide to install PocketHook, configure your server endpoint, and verify your first request from an Apple device.
1. Install PocketHook#
Download PocketHook from the App Store and open it on your iPhone, iPad, or Mac.
2. Configure Your Server#
PocketHook needs an HTTPS endpoint to communicate with. You can use:
- Agent Server — Self-hosted AI agent with LLM, tools, background jobs, and memory
- Your own API — Any server that accepts POST requests and returns JSON
- n8n — Self-hosted workflow automation with a webhook trigger
- OpenClaw — Self-hosted AI assistant with multi-channel messaging
Server Requirements#
Your server must:
- Accept POST requests with JSON body
- Return JSON responses
- Be accessible via HTTPS (HTTP is rejected for security)
- Optionally support Bearer token authentication
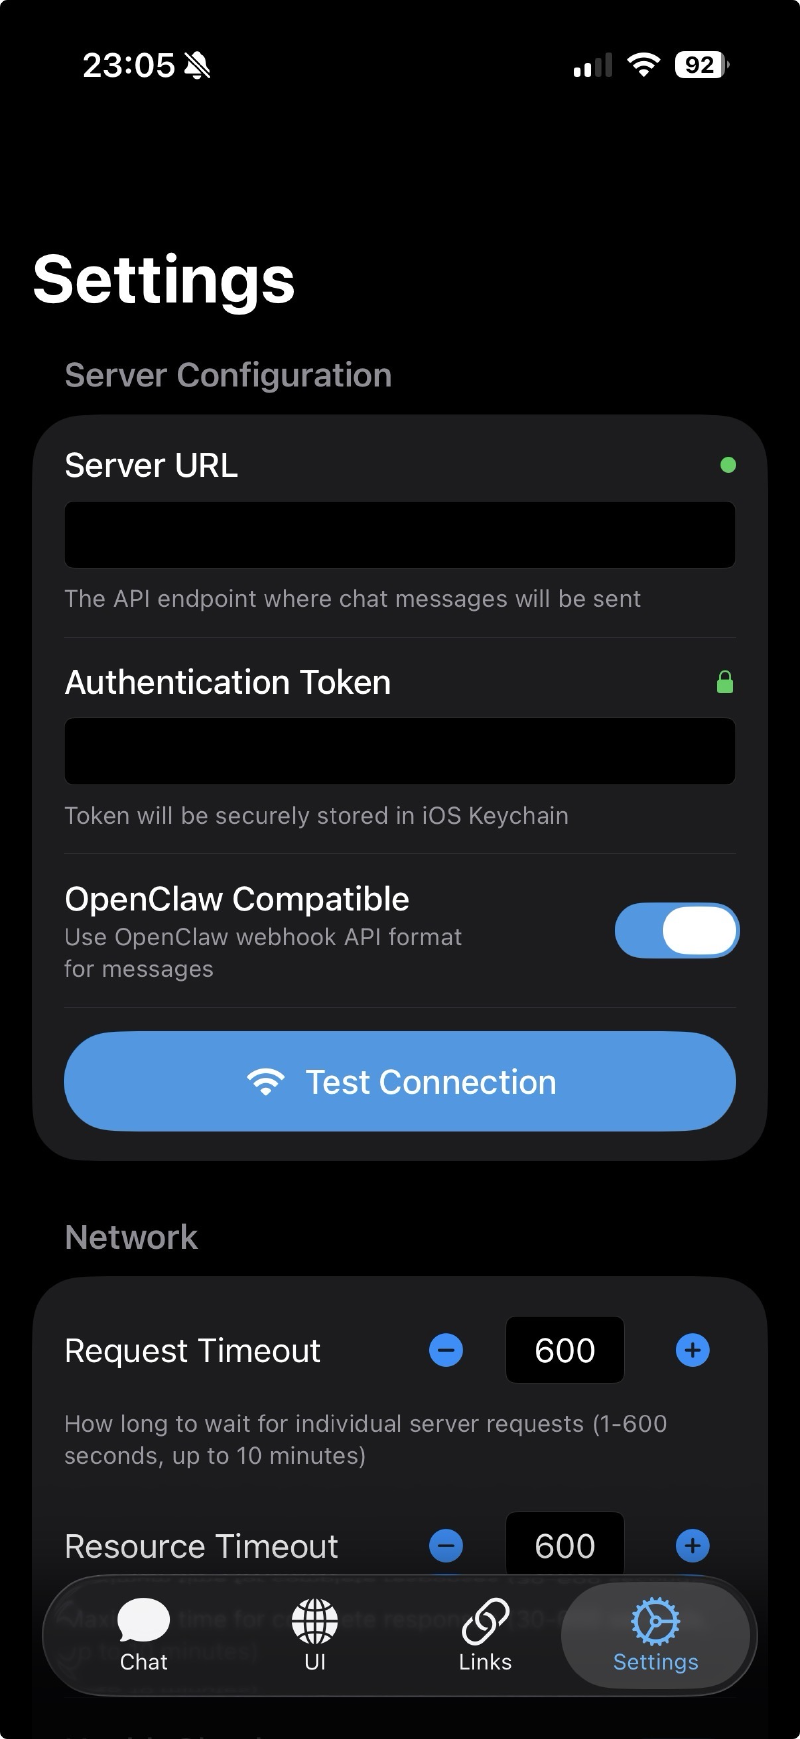
3. Connect in PocketHook#
- Open PocketHook and go to Settings
- Enter your Server URL (must be HTTPS)
- Enter your Auth Token (if your server requires authentication)
- Tap Test Connection to verify
4. Request Format#
PocketHook sends messages as a JSON array:
[{
  "sessionId": "uuid-v4",
  "action": "sendMessage",
  "chatInput": "your message here"
}]
5. Response Format#
Your server should respond with a JSON object:
{
  "msg": "Message displayed to the user",
  "shortcut": "OptionalShortcutName",
  "data": { "key": "value" },
  "url": "https://optional-url.com"
}
| Field | Type | Required | Description |
|---|---|---|---|
msg | string | Yes | Text displayed in chat |
shortcut | string | No | iOS Shortcut to execute |
data | object | array | No | Data passed to the Shortcut |
url | string | No | URL to open or display |
For multi-step automations, return an array of responses:
[
  { "msg": "Step 1...", "shortcut": "FirstShortcut" },
  { "msg": "Step 2...", "shortcut": "SecondShortcut", "data": { "input": "value" } }
]
6. Quick Start with the Starter Server#
Use our starter server template to get running in minutes:
git clone https://github.com/pockethook-app/pockethook-server.git
cd pockethook-server
bun install
cp .env.example .env
# Edit .env with your secret token
bun dev
The starter includes built-in commands (ping, hello, help, time) and examples for triggering Shortcuts. See the API Reference for the full protocol specification.
7. Using the SDK#
Install the pockethook-sdk package to build type-safe responses:
bun add pockethook-sdk
import { text, shortcut, responses, toResponse } from "pockethook-sdk";

// Simple text response
return toResponse(text("Hello from my server!"));

// Trigger a Shortcut
return toResponse(shortcut("Running...", "MyShortcut", { key: "value" }));

// Multi-step automation
return toResponse(responses([
  { msg: "Step 1", shortcut: "First" },
  { msg: "Step 2", shortcut: "Second" }
]));